iClicker

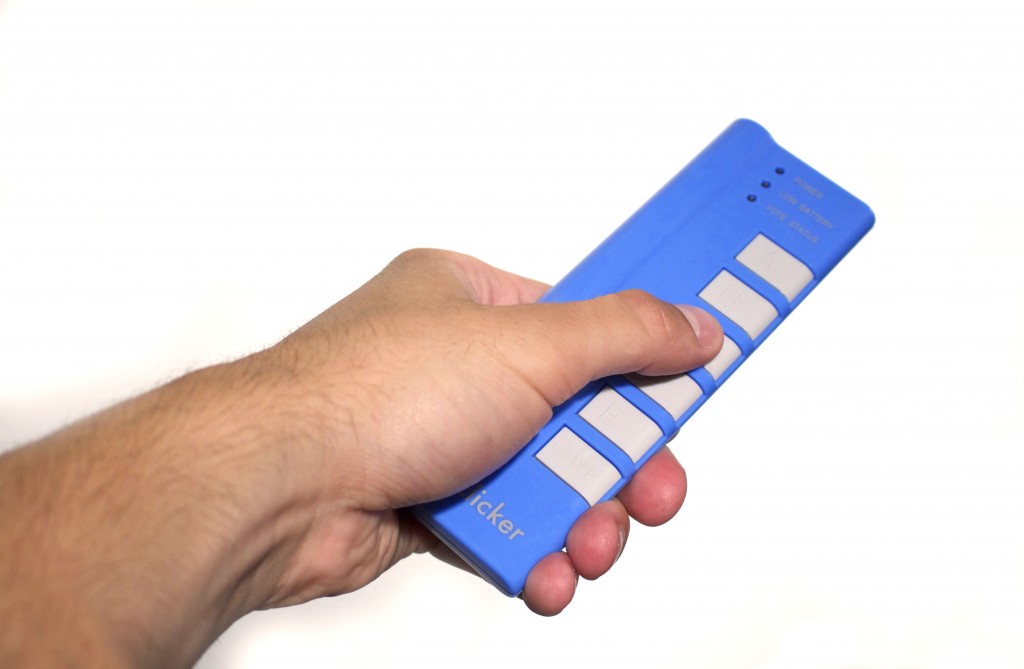
iClicker (commonly called “clickers”) is a classroom response system currently supported at the University of Toronto. iClicker software works in combination with presentation software like PowerPoint or Keynote. Instructors use the software to pose multiple-choice questions to students during class. Students respond to the questions using iClicker hand-held remote control devices, which transmit individual responses to the instructor’s computer to record and share results with the class.
iClickers are a great way to increase student engagement, especially in large classes, and provide immediate feedback on student understanding of the course material.
iClicker is an optional integration in Quercus. The integration allows for data to be transferred between iClicker Gradebook and the Gradebook in Quercus courses. This enables students to register their iClicker remotes directly within their Quercus course. It allows instructors to easily download the class list and student registrations from Quercus. Instructors can also upload iClicker session data to the course Gradebook in Quercus .
Where can I get more support?
Related resources / similar tools
Student Engagement – Not Formal Assessment
Please note that iClicker is supported for in-class audience response only. Instructors who wish to use this technology for formal assessment purposes should note that limitations with the technology, including WiFi and cellular connectivity, might limit the feasibility of using it for assessment. Please contact the U of T Bookstore for additional support in making adoption decisions.
iClicker for Mac OS Sierra / High Sierra, Mojave or MacOS 10.15 (Catalina) – you may need to implement a workaround in order to run the UofT Customized version of the iClicker software. Please follow the instructions for your OS version below.
iClicker for Windows 7 and Windows 8.1 – support from Microsoft has ended for those operating system platforms, and the iClicker software will not run or connect properly.
How to Use This Tool
iClicker (commonly called “clickers”) is a classroom response system currently supported at the University of Toronto. iClicker software works in combination with presentation software like PowerPoint or Keynote. Instructors use the software to pose multiple-choice questions to students during class. Students respond to the questions using iClicker hand-held remote control devices, which transmit individual responses to the instructor’s computer to record and share results with the class.
iClickers are a great way to increase student engagement, especially in large classes, and provide immediate feedback on student understanding of the course material.
iClicker is an optional integration in Quercus. The integration allows for data to be transferred between iClicker Gradebook and the Gradebook in Quercus courses. This enables students to register their iClicker remotes directly within their Quercus course. It allows instructors to easily download the class list and student registrations from Quercus. Instructors can also upload iClicker session data to the course Gradebook in Quercus .
Instructions
Enable iClicker Registration in your Course
Enable iClicker Registration in your Course
The iClicker tool is hidden by default. Follow these steps to enable the iClicker integration tool in your Quercus course, and to add the iClicker registration link to your course menu:
- Select Settings in Course Menu.
- Select the Navigation tab.
- Drag iclicker registration up from the list of hidden navigation items to the list of visible navigation items in the top half of this list.
- Select Save
Students will now be able to register their devices by selecting the i>clicker registration link in the course menu and follow the instructions.

Note: If you as an instructor (or TA) click on the iclicker registration link you will see the 3 options shown below. You do not need to click on any of those links. You will control your iClicker activities through the iClicker application on your computer. When students click iclicker registration they are taken directly to the registration process so this message does not apply to them.

- Select Settings in Course Menu.
Obtain an iClicker Instructor Base
Obtain an iClicker Instructor Base
To use iClicker in a physical classroom, you must have an iClicker Receiver Base.
- St. George Campus: To obtain an iClicker Instructor Base, fill in this request form
 .
. - UTM: Consult information about iClickers at UTM
 .
. - UTSC: Contact quercus.utsc@utoronto.ca for information about iClickers at UTSC.
- St. George Campus: To obtain an iClicker Instructor Base, fill in this request form
Download U of T iClicker Software
Download U of T iClicker Software
To use iClicker within Quercus, download the University of Toronto customized version of the iClicker Classic software:
- Download the appropriate .zip files to your computer
- Expand/extract the files
- Run the application
- Check for software updates
- Proceed with Course Setup
Windows 7 and Windows 8.1
Windows 7 and Windows 8.1:
Note: If your computer is running Windows 7 or Windows 8.1, support from Microsoft has ended for those operating system platforms, and the iClicker software will not run or connect properly. Please upgrade to a supported operating system if you require the use of the iClicker software.
MacOS Sierra/High Sierra/Mojave
MacOS Sierra/High Sierra/Mojave
Part 1: Download the Generic iClicker Classic Software
Note: If your computer is running Mac OS Sierra, Mac OS High Sierra or Mac OS Mojave, you may need to implement a 2-part workaround in order to run the UofT Customized version of the iClicker software. Please follow the Instructions for MacOS Sierra/High Sierra/Mojave.
- Download the current Mac version of the iClicker Classic software from the iClicker website
 .
. - Create a New Folder (on the desktop or another location of your choosing) for the iClicker software. Name the new folder ( e.g. “iClicker Classic” or something similar).
- Open the .dmg file that you just downloaded from the iClicker site, then
- copy the iClicker application (iclicker.app) from inside the .dmg file, and
- paste it to the new folder you created in Step 2
- Run the iClicker application from your folder. The first time you run iClicker from this new folder, it will automatically create all the supporting files and folders, including a folder called Resources. We will come back to the Resources folder in the next steps.
- Close the application. Do not proceed to setting up your course at this point.
Part 2: Add the UofT Customized Resources Folder
- Download the UT iClicker classic for Mac
 or Download UT iClicker classic for Mac
  to a different location/ folder than the generic version. Unzip if necessary and locate the Resources folder for the customized software.
 - Open the iClicker folder you created in Part 1: Step 2 and replace the Resources folder found there with the new Resources folder you have just downloaded (from the UofT Customized iClicker software download)
- Run the iClicker application again and proceed with Course Setup
- Download the current Mac version of the iClicker Classic software from the iClicker website
MacOS 10.15 (Catalina)
NOTE: Instructors who update to MacOS 10.15 (Catalina) will need to adjust their MacOS Privacy settings before running the current version of iClicker software on the new OS.
It is recommended that you disable your MacOS auto update and adjust the Privacy settings before updating your MacOS. iClicker software that fully supports future requirements of MacOS Catalina is scheduled to be available January 2020.
For full details and instructions, please see: How to Run iClicker on MacOS 10.15 (Catalina)

Course Set Up
Course Set Up
Add a Quercus Course to the iClicker Application
When you first open iClicker, you will see the Welcome Screen with no courses listed. To add your course, follow the steps below:
- Click + Create. The Create New Course window appears.
- Enter your Course Name. This name does not need to match the class name in Quercus. Click Create.
- Select your course name from the course list and click “Settings.”
- A window will open, click on the Gradebook tab along the top of this window.
- Select your Primary Institution
- Next to LMS Name, you should see Quercus
- Click Select Course

- A pop-up window will prompt you to log in with your UTORid and password. Click Authorize to continue.
- From the list of courses that appear, select the course you want to sync with iClicker, then click Select.
NOTE: The course selection window displays the master course along with any sections under the master. This will occur even with courses that have a single section (i.e. you will see two entries for your course). The master course appears first, before the sections.
If you select the master course (without any section distinctions) this will pull the entire roster for all sections. If you select one of the sections this will only pull the roster for that particular section.
- The course that you selected should now appear following “LMS course” as seen below. Click Save. Close the Course Settings window.

For more information about the optional settings, such as only sync remote registrations with students in your LMS and Export and Upload Options, please refer to information on the Instructor Guide: iClicker Classic Integrate with Canvas
 .
.Sync Quercus Roster with iClicker Application
Sync Quercus Roster with iClicker Application
The iClicker integration allows instructors to sync their class list and student registrations from Quercus. Note, only those with Teacher access to a Quercus course will be able to use the Sync Roster function for iClicker.
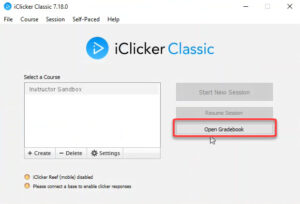
- From the i>clicker software home, select Open Gradebook.

- To get the course roster from your Quercus course, click Sync Roster.
.
- Log in with your UTORid
- After loading, the class list from your Quercus course should now be visible in the iClicker Gradebook.
- From the i>clicker software home, select Open Gradebook.
Sync iClicker Scores with Quercus Gradebook
Sync iClicker Scores with Quercus Gradebook
The iClicker integration allows instructors to upload iClicker session data to their course Gradebook in Quercus. Note, only those with Teacher access to a Quercus course will be able to use the Sync Scores function for iClicker.
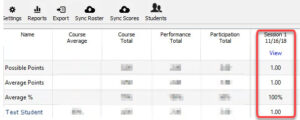
- After using the iClicker software to ask questions in class, student results will appear in a column in the iClicker Gradebook (the column called Session 1 in the example below).

- To upload those student scores to your Quercus course, select Sync Scores.

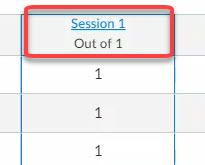
- This will generate an assignment in your Quercus course with the same name from the iClicker Gradebook (Session 1, in our example). A column for this assignment will appear in the Grades section of your course. The scores from the students who answered questions in that iClicker session should be visible in the Grades section of your Quercus course.

- After using the iClicker software to ask questions in class, student results will appear in a column in the iClicker Gradebook (the column called Session 1 in the example below).
Used Remotes
Used Remotes
As of December 31, 2014, students who have purchased a used remote and register their used remote online with iclicker.com will be charged a one-time fee of $6.99.
Instructors are encouraged to enable the iClicker integration tool in Quercus courses. This will allow students who purchase used iClicker remotes to register their remotes in their Quercus course without paying a $6.99 used remote registration fee.
Guides
Student Response System Resources
Additional Resources
University of Toronto, Centre for Teaching Support and Innovation Resources
- https://teachingdev.lamp4.utoronto.ca/teaching-technology/student-response-systems/
- Using Classroom Response Systems in the Classroom
 .
. - University of Toronto Provostial Guidelines on the Use of Digital Learning Materials
 .
.
Please contact your divisional support for assistance with setting up iClickers in a Quercus course.
iClicker Support Pages
iClicker Support Pages
Last Modified:
16 February, 2023
This work is licensed under a Creative Commons BY-NC-SA 4.0 International License


